If you are looking for something to do in your vSphere home lab this is a neat little project: Weathervane Open Source Benchmarking Tool. Standing up Weathervane in the home lab will provide hands-on for developing skills including creating a template VM, creating a guest customization specification, working with some basic Linux commands, working with an app with multiple tiers, cloning VMs, and monitoring performance metrics.
The architecture of Weathervane can be as simple or complex as you want to make it. The tool provides a way to generate a predictable load to help you gain some experience with deploying a multi-tier application, benchmarking the application, and monitoring performance in a virtualized environment.
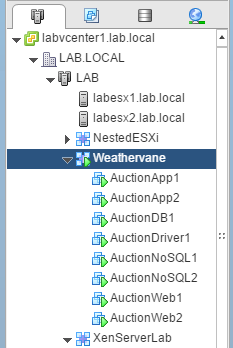
Weathervane includes an Auction application made up of different services: workload driver (simulates users accessing the application), web services, database services, application services, etc. All services can be run from a single VM or can be provided across several VMs. This allows for things to be configured more like a “real world” environment and to spread load across multiple guests which can be spread across multiple hosts in a cluster. Here is the logical layout of how I have Weathervane deployed in my home lab:
The Weathervane user guide, located on github, is very detailed and provides step-by-step instructions for deploying, configuring, and running Weathervane. This post provides an overview of how I set up Weathervane in my home lab, an example of the results generated from the Weathervane runs, and a look at the performance metrics I observed in lab during the Weathervane runs.
The Weathervane user guide walks through setting up a deployment in excellent detail. Here is a high level summary of the steps I followed to get Weathervane up and running in my home lab:
Create a VM – The Weathervane user guide provides details for creating the VM. I used 4 vCPUs and 10 GB of memory for the template VM – adjusted this as needed for other VMs in the app.
Guest OS: Linux – Red Hat Enterprise Linux 7 (64 bit)
CPUs: 4
Memory: 10 Gb
Hard disk: 20 GB (minimum) – I set mine to 40 GB (Thin provisioned).
Build the Weathervane Executables and run the Auto Setup
cd /root/weathervane
./gradlew clean release
./autoSetup.pl
Reboot VM
Update /etc/resolv.conf – The nameserver line should be changed to the IP address of the server which will run the Weathervane DNS zone.
Configure the named zone file /var/named/weathervane.forward.zone
Make any other necessary changes required for your enviornment. For example I had to set the default gateway in /etc/sysconfig/network
Shutdown the VM and convert it to a template.
Create a Guest Customization Specification to set the hostname and IP Address when cloning from template.
Compute name: Use Virtual Machine name
Network Type: Prompt User
DNS Primary: IP of VM which will be running Weathervane DNS
DNS search paths: Weathervane
Clone VMs from the template and apply the Guest Customization Specification to create the VMs to be used as Auction Drivers, Web Servers, App Server, Database Servers, etc…
Configure the server which will run the Weathervane DNS zone (this server is specified in the resolv.conf across all VMs) to start named at boot.
systemctl enable named
systemctl start named
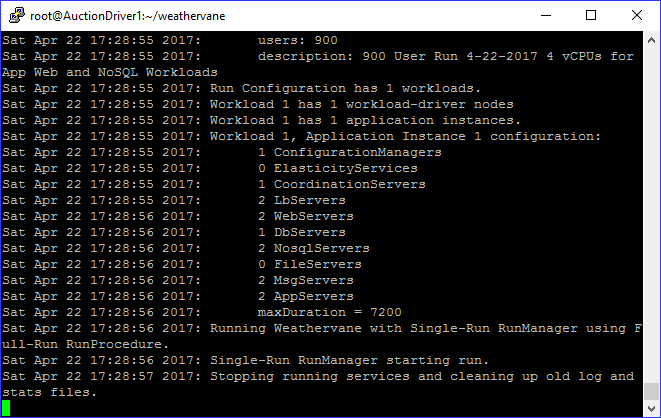
Modify weathervane.config (there are a ton of options here, I am mainly changing the number servers to use for App, Web, Load Balancing, NoSQL, etc.) with the specifics you want to use for the run. The user guide covers the weathervane.config options in detail.
Run Weathervane!
The DNS configuration is used to determine which services will run on which VMs. Once you clone and configure each VM update the /var/named/weathervane.forward.zone with the correct IP Addresses for the VMs running each service. Then restart named on the DNS server. Here is the weathervane.forward.zone file configured to match the VMs deployed in my lab environment:
I am running services across two ESXi hosts. I have DRS set to “Partially Automated” and I have manually separate workloads (for example AuctionApp1 runs on labesx1, AuctionApp2 runs on labesx2). I created a Weathervane vApp mostly for organization but also so I can export or clone the whole thing.
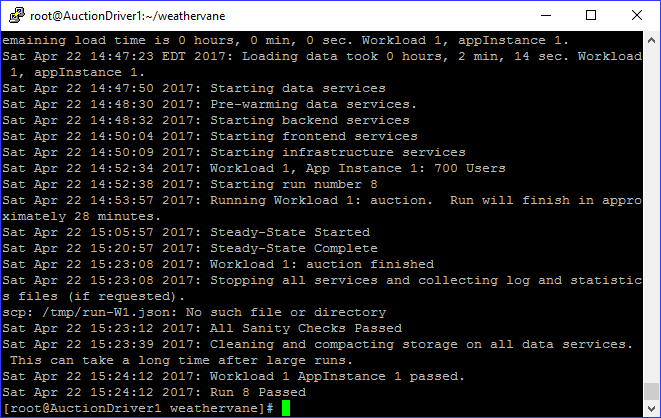
When you run Weathervane it will load the data required for the run and start the services on the VMs configured via DNS.
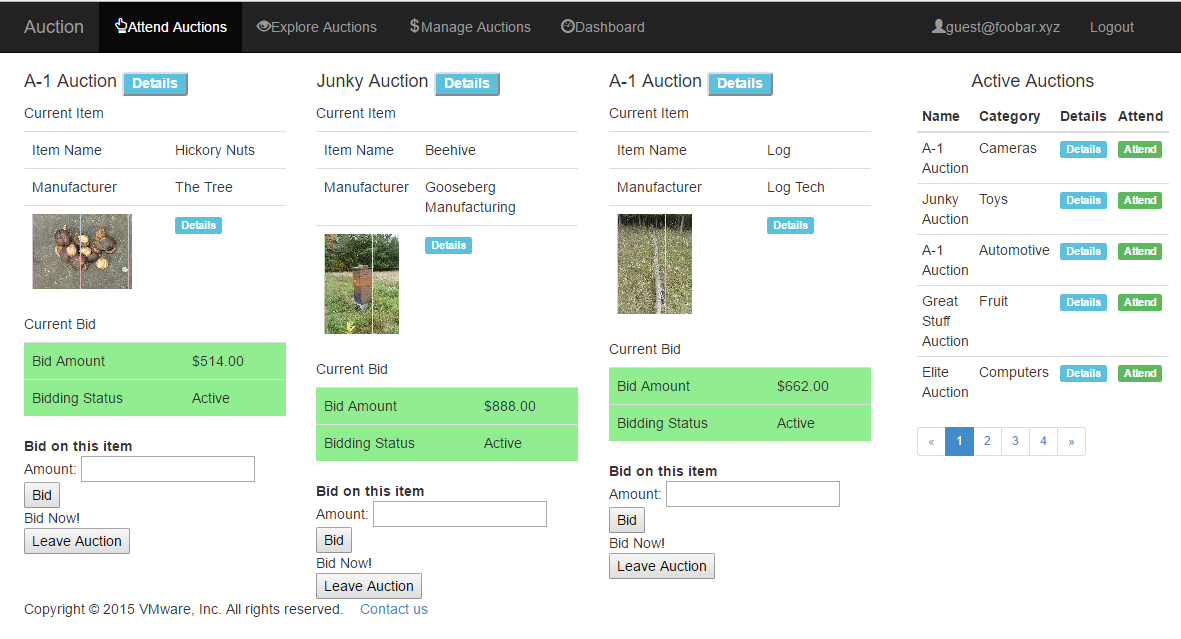
While Weathervane is running you can interact with the application. Just point you browser at the IP of one of the configured load balancers and log in using the username guest@foobar.xyz with the password guest. You will be able view auctions and place bids.
Once the run is complete the services are stopped, things are cleaned up, and the run is analyzed for pass/fail.
The Weathervane run will produce a csv file, by default this file is /root/weathervane/weathervaneResults.csv. Here is a graph I created using the weathervaneResults.csv to display operations per second and http requests per second for the different user runs from 300-850 users (850 users was the max for successful runs in my home lab with the configuration I am using).
If you monitor the performance in the environment you will notice some patterns. The two red arrows in the performance chart from the AuctionDriver1 server point out the start of two different runs.
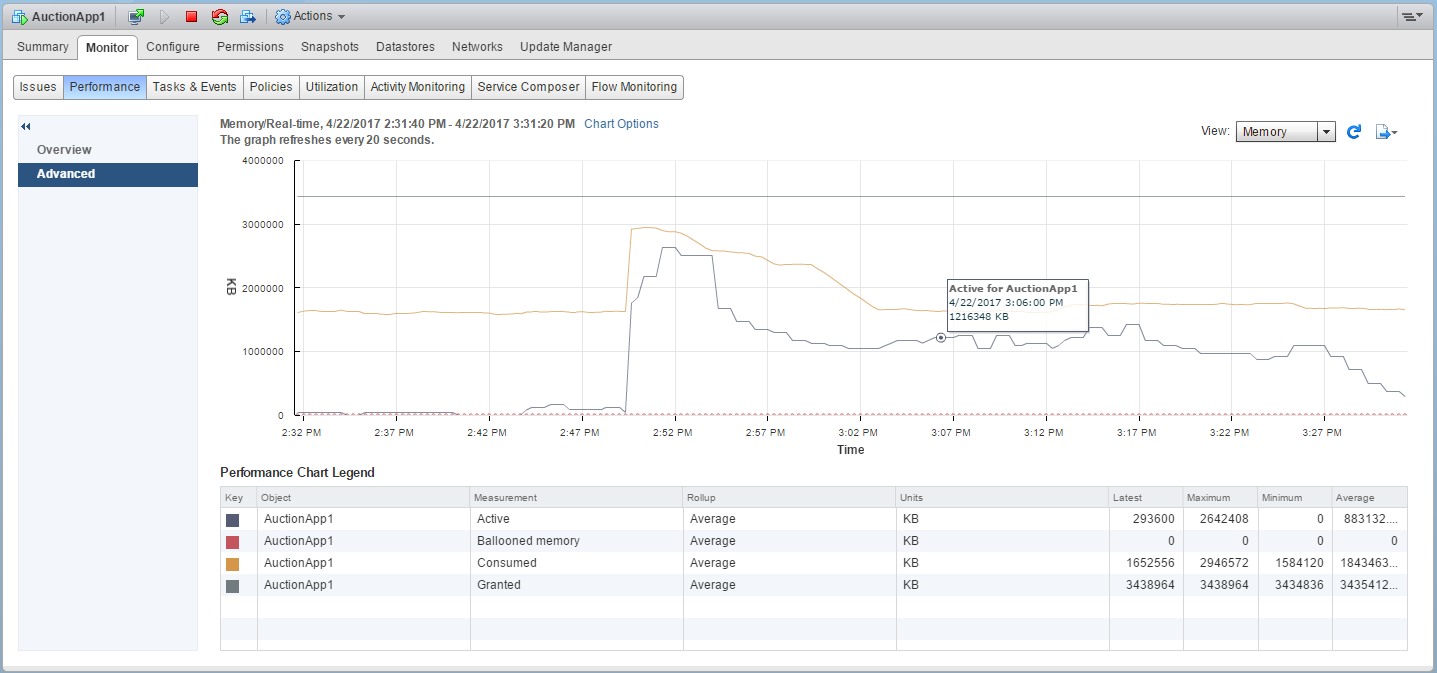
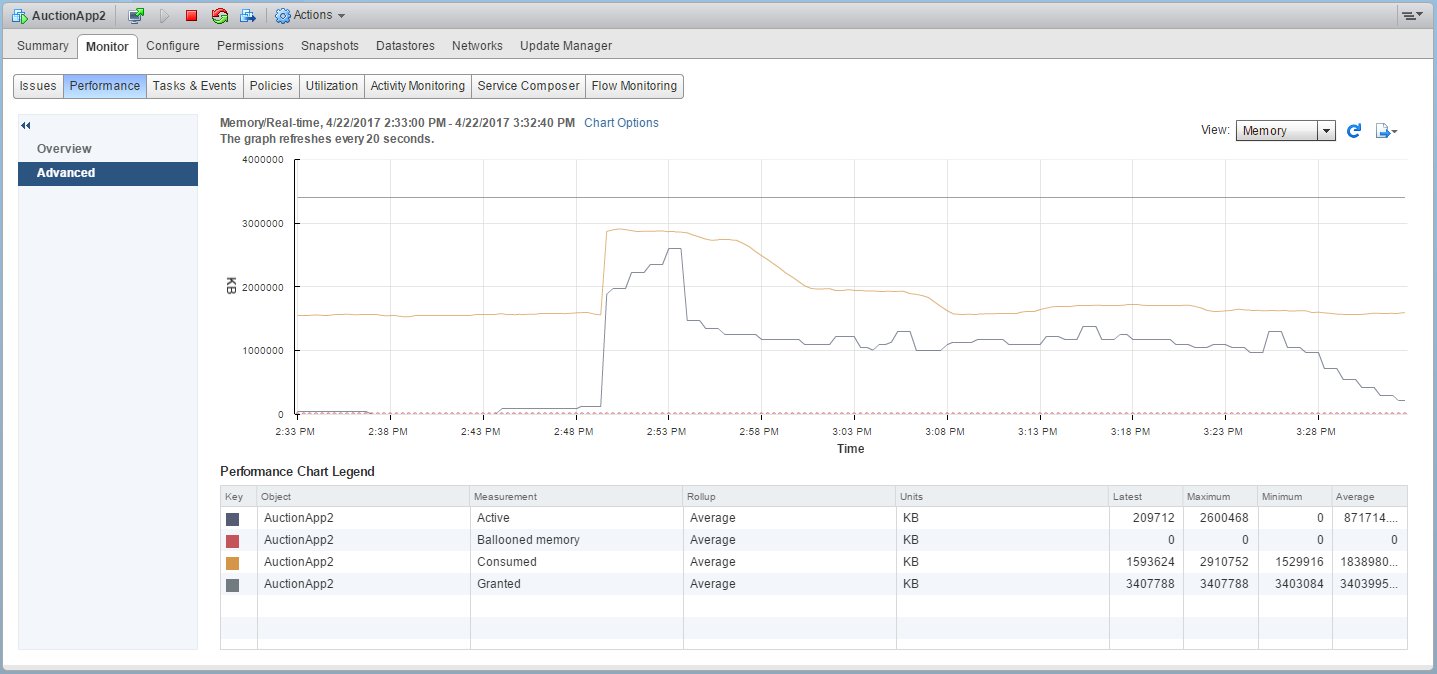
If we look at the memory charts for the Auction App Servers during the run. You can clearly see the memory consumption change through the start up, steady state, shutdown, and cleanup.
Notice how the memory consumption in the second App Server is nearly identical.
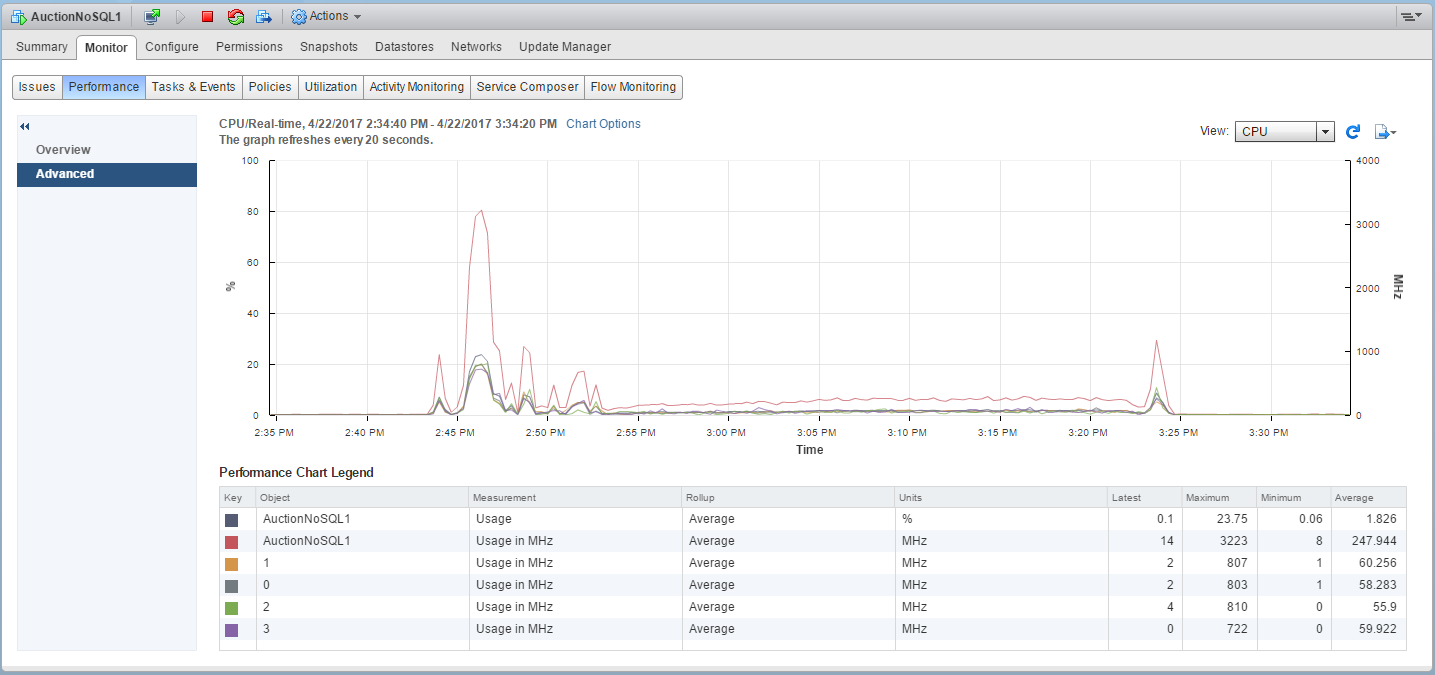
Same with CPU for the two Auction NoSQL Servers. You can see where the run started, where it reached steady state, and where it ended.
Notice how the load is very similar across both the NoSQL Servers.
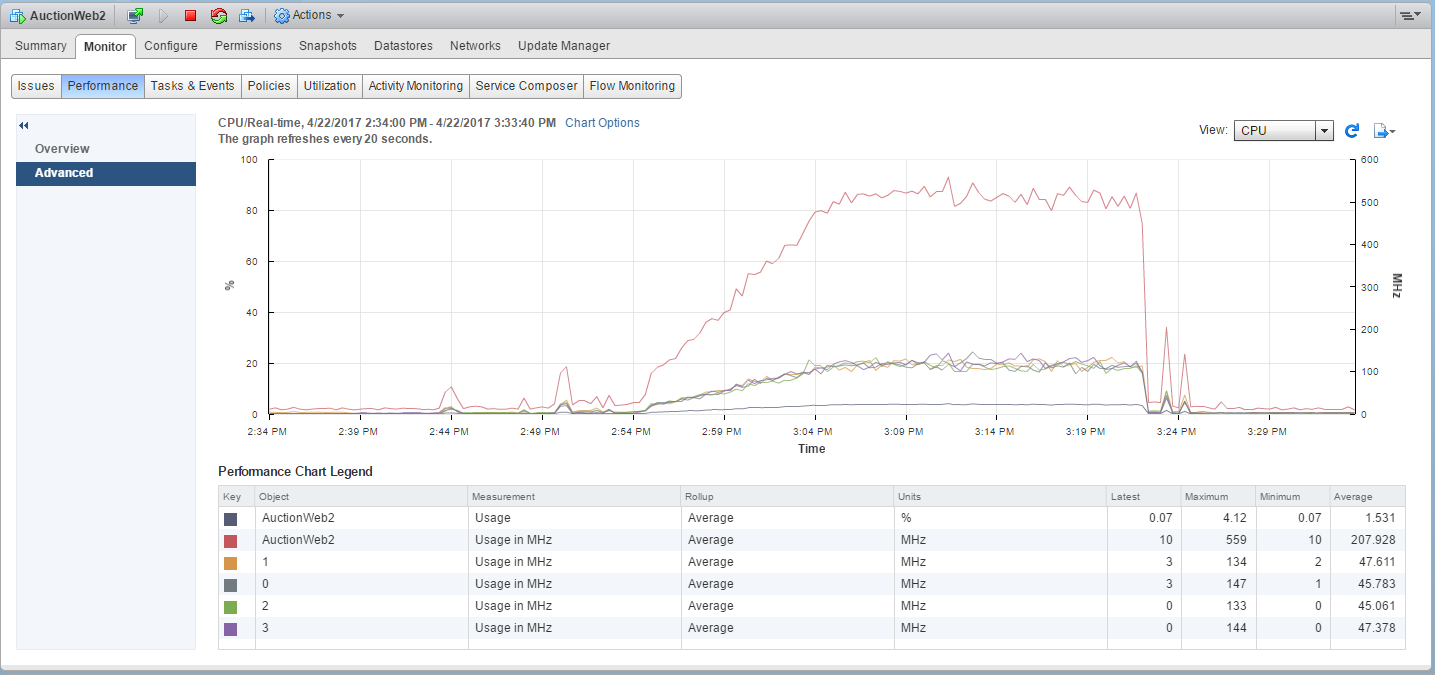
Pretty much the same thing for the CPU of the Auction Web Servers. Both servers run through the start up, steady state, application shutdown, and clean up.
The impact of the load on the CPU across both Web Servers is nearly identical.
Great lab project! There are a number of other things you can do for testing and familiarization in your lab environment. Here are just a few thoughts:
Adjust resources for the different services to determine how that impacts the number of users the application can service or the impact on the ESXi host.
vMotion (change host, change datastore, or both) App Server or Web Server VMs during a run. How is the run impacted? What is the difference in the time it takes to vMotion a VM which is idle from a VM which in the middle of a Weathervane run?
Take a snapshot of or delete a snapshot from a VM during a run. How is the run impacted? What is the impact of taking a quiesced or memory snapshot?
Set reservations or limits for CPU/Memory on VMs or use Resource Pools for different tiers in the application. How is the run impacted?
There is a ton of other stuff you could experiment with. If you are looking for something to do with you lab… try Weathervane out.