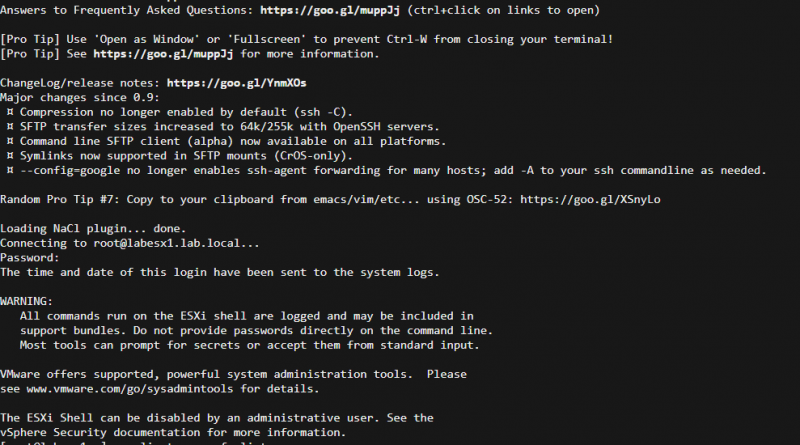
Web Browser ESXi SSH Console
Messing around in the home lab this morning and I stumbled across something that I did not realize was there.
Read MoreHyperconverged, Virtualization, VMware, Citrix, Datacenter Administration, and more…
Messing around in the home lab this morning and I stumbled across something that I did not realize was there.
Read More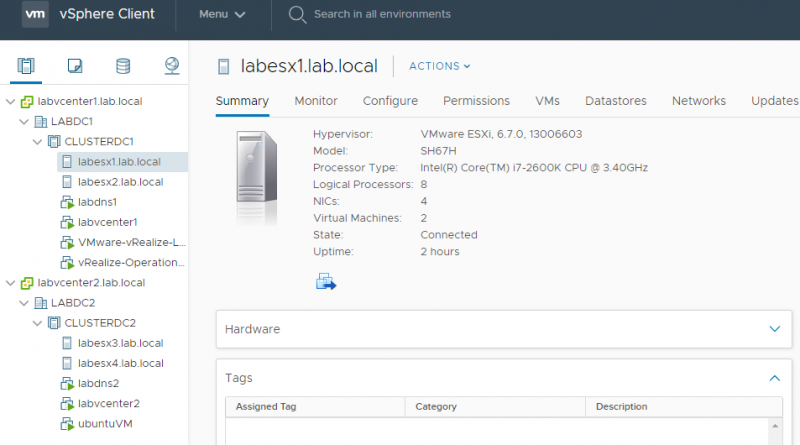
Little spring cleaning happening in the home lab. Not replacing any gear… yet. Just cleaning up, refreshing somethings, moving to
Read More
With the release of vSphere 6.7 Update 2 (GA today and ready for download) folks are chomping at the bit to upgrade in order to take advantage of some of the great new features which are available in this release. There is a lot of information out there on how to upgrade vSphere so in this post I wanted to provide an overview of planning an upgrade of a vSphere (vCenter and ESXi) environment.
Read More
I was looking for away to easily add an entry to an ESXi host’s /etc/hosts file without using SSH to connect to the host. ESXi has a file management interface which can be accessed with standard GET/PUT operations. I put together a quick example of doing this with PowerShell using Invoke-WebRequest.
Read More
It has been a good while since I have worked with vSphere Management Assistant (vMA). I used it fairly often when I was managing a vSphere environment. Since I am teaching the vSphere Optimize and Scale class during the winter semester I spun up the vMA in the homelab to re-introduce myself to it.
Read More
Here are a couple of basic guides I put together for the VMware ITN classes at TCC. Back to basics for sure, but not everyone works with vSphere environments regularly, so this provides a guides for basic tasks – Uploading an ISO Image to a ESXi Datastore and Attaching an ISO Image on a local disk to a Virtual Machine.
Read More
In this post I am going to look at the two most common methods: using vMotion to migrate both the storage and running state of the vCenter virtual machine to a SimpliVity host, and using Storage vMotion to move storage and then removing and re-adding the vCenter virtual machine to inventory on a SimpliVity host.
Read More
With the efficiency SimpliVity’s Data Virtualization Platform (DVP) brings to data with deduplication, compression, and optimization SimpliVity customers often need to scale compute before they need to scale storage. As long as the SimpliVity environment is capable of providing the storage capacity and performance required the compute resources can be scaled using what we call compute nodes.
Read More
I just finished updating my home lab ESXi host to ESXi 6.0U1b. I was just poking around after doing the update and thought it might be useful to dig into the vSphere Installation Bundle or VIB. A VIB is an installation package which containing software, updates, patches, and drivers which can be installed on ESXi hosts.
Read More
The talk was on using PowerCLI to manage SSH. Specifically about using PowerCLI to report on the status of the SSH Service on ESXi host (is it running, what is the policy set for), updating the policy (Start and Stop with Host, Manual, Automatic), stopping and starting the SSH on ESXi hosts, and configuring the firewall for the SSH service to limit access to the service.
Read More