My GaragePi is a simple Raspberry Pi project I put together for out in the garage. Originally I was just going to hook it up to the TV to use it for Web Browsing and media streaming but I decided to take things a step further to add a humidity and temperature sensor and figure out a cool way to store it.
I have some other ideas for other features I may add to the GaragePi one day but for starters this is what I have going (and what I am going to cover in this post):
Everything stored neatly in a cigar box
Push button to safely power off and on the Raspberry Pi
Raspberry Pi Power Indicator (is this thing on)
Get the current temperature and humidity of the garage.
Create a remotely accessible Dashboard (a simple page) to display stuff
For this project I used a Raspberry Pi 3 that I received with a Vilros project kit I purchased from Amazon. The Vilros Raspberry Ultimate Project kit is a fantastic kit if you are just getting started. Along with a Raspberry Pi 3 it includes a SD Card, a power supply, a case, a breadboard, a GPIO ribbon cable, a GPIO breakout board, a HDMI cable, and a bunch of other components such as switches, jumper wires, resistors, and LEDs to use for projects.
I really like the project kits from Vilros, I have ordered a couple different versions of their kits and all of them have come with great quality components. If you are just getting into tinkering with Raspberry Pis the ultimate project kit includes everything you need to get the Pi up and running and the components to get you started on some interesting projects using the Raspberry Pi’s GPIO.
For the GaragePi I used a few other parts and pieces: a temperature/humidity sensor, a momentary switch which could be mounted in the cigar box to act as on on/off button, and a small (but usable) wireless keyboard (which also included media remote keys). Each of these are shown below with links Amazon.
Here is the Python code I am using to get a reading from the sensor (pretty much taken right from the examples in the Adafruit DHT Python library):
#!/usr/bin/env python
#
# Returns temperature reading from DHT22 Sensor
# using Adafruit_DHT library and DHT22 Sensor
# https://github.com/adafruit/Adafruit_Python_DHT
#
import Adafruit_DHT
import time

# Define Sensor Type
sensor = Adafruit_DHT.DHT22
# GPIO Pin
pin = 25

# Seconds to sleep between sensor readings
sleeptime = 60

hightemp = 90
lowtemp = 20
highhumid = 90

# Output Files
humidfile = '/var/www/html/humid.txt'
tempfile = '/var/www/html/temp.txt'

def GetTemp():
   tcolor = "GREEN"
   hcolor = "GREEN"
   #Get date/time
   dt = time.strftime("%H:%M")
   #Get Humidity and Temperature Reading from Sensor
   humidity, temperature = Adafruit_DHT.read_retry(sensor, pin)

   #Did we get it?
   if humidity is not None and temperature is not None:
      if humidity > highhumid:
         hcolor = "RED"

      tempfh = temperature * 1.8 + 32
      if tempfh > hightemp:
         tcolor = "RED"
      if tempfh < lowtemp:
         tcolor = "BLUE"

      fmtemp = '<font color="' + tcolor + '"><b>{0:0.1f} F</b>'.format(tempfh) + ' at ' + dt + '</font>'
      fmhumid = '<font color="' + hcolor + '"><b>{0:0.1f} %</b>'.format(humidity) + ' at ' + dt + '</font>'
   else:
      fmtemp = "NA"
      fmhumid = "NA"
   #Write Formatted Temperature and Humidity to File
   with open (tempfile, "w") as text_file:
     text_file.write(fmtemp)
   with open (humidfile, "w") as text_file:
     text_file.write(fmhumid)

while True:
   GetTemp()
   # Sleep for sleeptime
   time.sleep(sleeptime)
The temperature and humidity readings are taken every 60 seconds (or whatever sleeptime is set to) and the readings are written to files. I have put some tests in there to format what is written to the files in order to change the color using HTML tags based on high or low temperature/humidity settings.
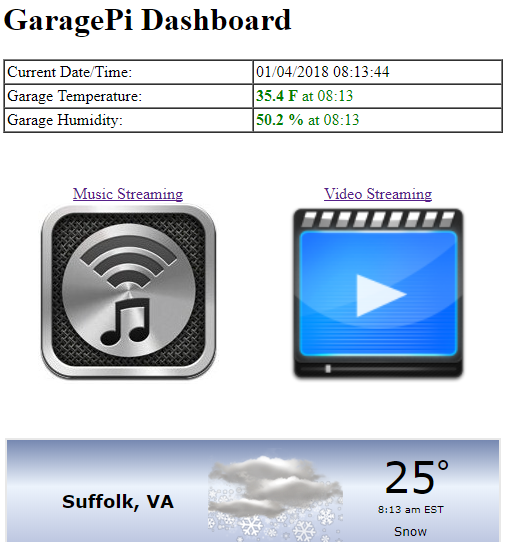
The files are then included in my GaragePi Dashboard which is served up from the web server running on the Pi. I simply installed the Apache webserver and PHP and set up a pretty basic webpage to display the temperature/humidity readings from the files where they are written, added some links to my Synology media services, and a widget to display the current weather outside.
It’s not very fancy (yet) but here is my GaragePi dashboard.
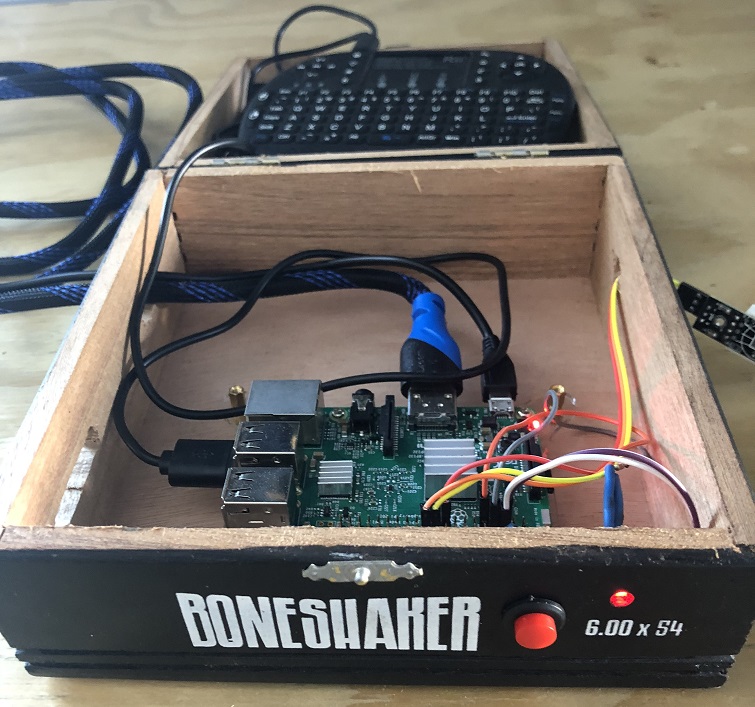
Here is a picture taken when I was mocking things up – mounting the Raspberry Pi, routing the cables, and getting things working on the breadboard:
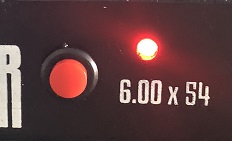
I mounted the uxcell momentary switch and the power indicator LED to the front of the cigar box for easy access to safely shutdown or power on the GaragePi with the push of a button. The LED allows me to obtain the current power status at a glance.
Here it is all soldered up with the switch, LED, and DHT22 Sensor. Everything fits nice and neat in the cigar box.
The cigar box has holes cut for the HDMI cable, power cable, and access to the USB ports. Still trying to figure out the best way to mount the DHT22 temperature/humidity sensor.
I mentioned I have some other ideas for the GaragePi. Couple of things I’ll probably be adding in the future will include a door open sensor and possibly a motion triggered camera. I’ll probably also wire up an indicator LED which lights when the DHT sensor is taking a reading just to add some blinky lights. I may even build a widget to display on vHersey.com which shows the temperature and humidity information on the sidebar.
Here is quick index of the resources I used to get things up and running:


")


Love this! Thanks for sharing, Hersey.